Looking for a sound clip, but can’t find it? Don’t worry, Voicy offers you two options (MP3 and YouTube) to create a Voicy (sound clip) yourself.
Option 1. File (MP3)
First, keep your sound on your hard drive. If your sounds are already MP3, you are ready to upload them. If your sounds happen to be WAVs or other types of files, convert them to an MP3 format. There are many websites on the internet that do this for free. After doing this, you are ready to upload. Now sign up and create a login name for free or click the red ‘upload’ button if you are already logged in.

Once on the upload page, there are 4 steps you have to go through to create your own Voicy.
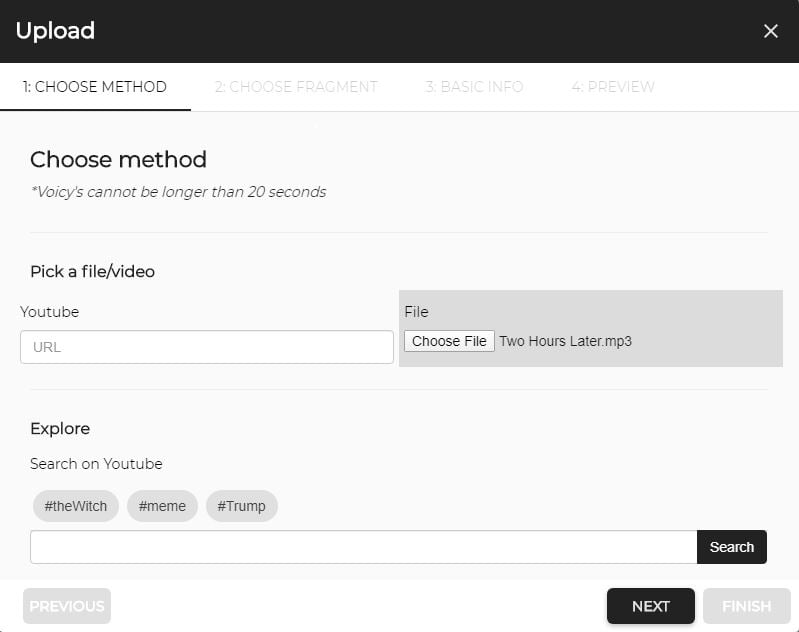
Step 1. Choose method
If you want to upload a file, click the ‘choose file’ button or drag the file to the box. After that click on the ‘next’ button.

Step 2. Choose Fragment
This step is skipped. Only necessary with the YouTube option.
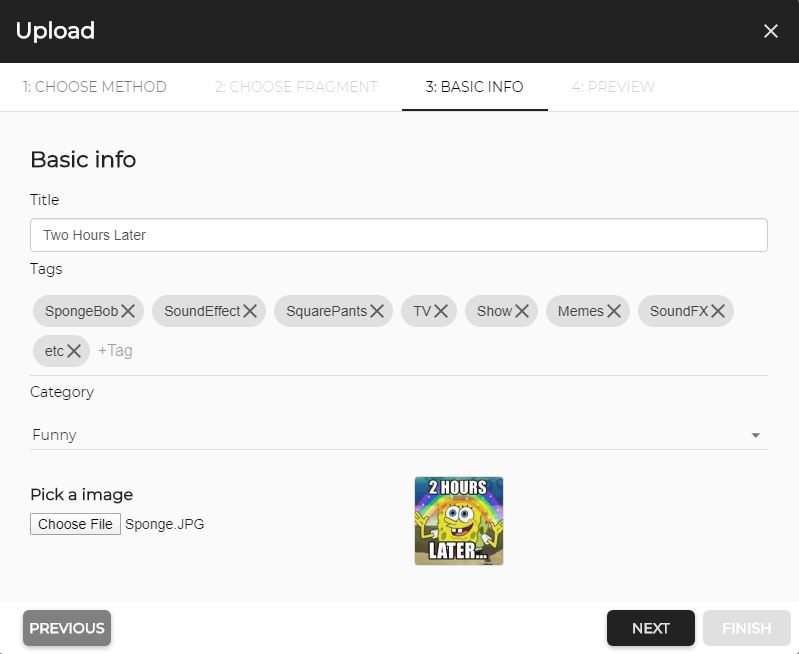
Step 3. Basic Info
Now start customizing your Voicy:
- Use a short and concise title that describes the topic or what you hear
- Use appropriate tags to provide context about your Voicy
- Select the right category
- Upload a matching photo

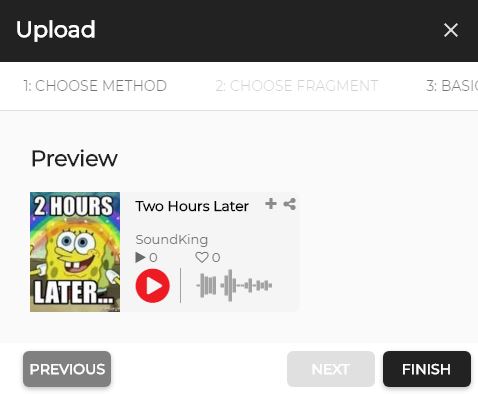
Step 4. Preview
At last, you will see a preview of the final creation. Check if everything is to your liking. If not, go back to the previous steps to adjust your Voicy. If everything is to correct, you can click on the ‘finish’ button to permanently upload your Voicy.

Finish!
Ready to play and/or share on social media.
Option 2. YouTube
To upload a Voicy via a YouTube video, the same four steps are used as in option 1. Only two steps are different. In step 1, instead of uploading an MP3 file, use the URL video YouTube link you want to use or search for a YouTube video from the search bar. In step 2, which is skipped when uploading via an MP3 file, you can select the fragment (maximum 20 seconds) of your chosen YouTube video. To give you a better picture, below you can see a video example of the four steps required to create your own voicy.

